Easy Steps to Install PVC Flooring
Popularly referred to as vinyl flooring, PVC flooring makes for an affordable material ensuring super quick installation on any flat surface. Made to deliver exceptional level of resistance to water and durability, PVC flooring can efficiently withstand normal wear and tear. Minimal maintenance on the part of owner will make it last for years together. Also it is possible to keep it looking fresh and new as installed on the first day.
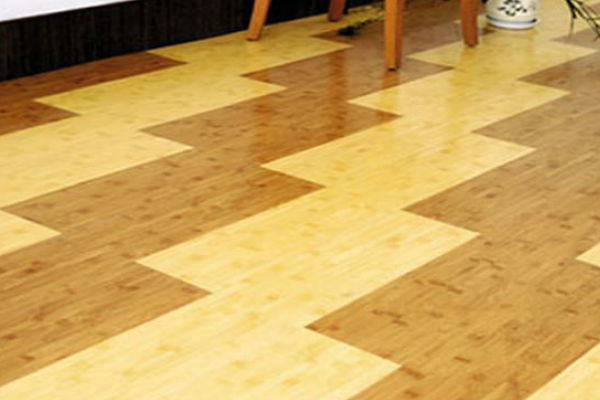
A wide variety of PVC flooring is available as the self-stick type. Hence, there s no requirement for using messy adhesives for installation process. DIY installation by one person is possible. The best part is that it takes very little efforts for subfloor preparation. The material is available in a wide variety of pattterns and designs to compliment decor of any room.
Following the instructions mentioned below will help you install PVC flooring without effectively:
Instructions
Step 1: Cleaning
The first step involves cleanin of floor properly. You need to sweep the installation site using a broom with stiff bristles. This will remove all of the loose dirt from the floor. Thereafter, it is important to mop the floor using a pH-neutral cleaner. Also scrub off ingrained dirt targetting dirty patches using a nylon bristle scrub brush. Using a clean towel, dry the floor.
Step 2: Inspection
Assess the floor for all kinds of dips or rises on the surface. You can use a leveling bar to find out uneven portions on the floor. Locating any gaps across surface is easy via dragging the bar. Mark all high and low spots using a piece of chalk.
Step 3: Levelling
It is imprtant to level floor via grinding down high spots. A concrete grinder is known to be the best tool for the same. It works on both wood and concrete surfaces. Sweep away all residue. Now fill in low regions with a self-leveling compound. Simply pour the compound into the low regions and spread it even with bordering floor surface with trowel’s flat side. Fill all small chops or cracks with a compound in the floor surface. Make sure the compound is allowed to cure overnight.
Step 4: Make Crossing Lines
Make some crossing lines right in the middle of the floor. You need to measure these from opposing walls of room. Create lines with the help of a chalk. The two ends of chalk line must be place n the middle of opposing walls. Now lift the string slightly from the floor surface. Release the line immediately in a manner that it snaps against the floor. It should also leave a straight line of chalk that travels down the middle point of the room. You must repeat this process for other two walls. Make sure you adjust the marked cross for the middle of room to help the line generate 90-degree angles. The intersection will prove to be your guideline for installation of flooring.
Step 5: Flooring
This step shoul involve unrolling of PVC flooring’s first section across the surface with the help of chalked line that runs across the room’s longest length to serve as a guideline. Make sure you start the flooring around 1/8 inch from the wall. You should roll it across the room towards the other wall. Also use a straightedge to cut the flooring at a point 1/8 inch from opposing wall.
Step 6: Rolling
It is time to roll the flooring back up. Simply remove the backing paper from the roll’s exposed end. You need to stick that end onto the subfloor. Now unroll the flooring again. Eliminate backing paper as you go along to expose adhesive on flooring material’s back. Cover up the complete line from wall to wall. You must maintain a straight line with the help of chalk guideline.
Step 7: Place Flooring
You need to use the same process to place the rest of PVC flooring. Here, you must work in strips butted tightly against flooring piece laid. In case, the flooring is patterned, the adjacent floor rolls pattern must match. Cut pieces with the help of utility knife on the edge of the floor lengthwise as per the requirement. You must maintain the 1/8-inch gap between the wall and flooring edge to ensure subfloor expansion and contraction for temperature changes.
Step 8: The Final Step
You need to push a long-handled squeegee across floor surface. Doing this from center to exterior edges, simply eliminate all air trapped underneath the flooring. There may be some interruptions to floor adhesions by air. Use of squeegee guarantees tight aherence of subfloor.
